mmanolis2001 is an "elite fish yaker" on our
Maryland Kayak Fishing Forum and he was awesome enough to share some of his knowledge with us on the site, so I wanted to share this info with all of my readers as well!! Enjoy!! This was a custom build with the MKF logo!!! Only words that can describe his work is AWESOME!!
For
Rod Building Tip Part 1
__________________________________________________________________________________
Basic Thread WeavingI decided to do something special for this
site in this writeup. Lets look at the process involved in basic pattern
weaving. I am in no way an expert at weaves. I have done several over the years
ranging from simple names and initials to single color logos. These types of
weaves are the most basic and involve one base wrap thread and single color
pattern threads. So what are the base wrap and pattern threads?
The base
wrap thread is the base thread that wraps around and up the blank. This is the
base in which the pattern threads are weaved in and out of. This thread will be
a continuous wrap up the blank. The Pattern threads are the group of threads
laying parallel to the blank. The pattern threads can consist of a single color
or multi colors (Layers) for more complex color changing weaves.
The
weave patterns are also broke up into thread counts for both vertical (base
wrap) and Horizontal (Pattern Threads). For example a weave with a thread count
of 120 X 60 would have 120 Base wraps around the rod and 60 pattern threads. The
base wraps always wrap around the rod and the pattern threads are either moved
to the left or right of the pattern. The pattern thread movement to the left or
right is dictated by the weave pattern. A pattern thread that is to the right
will be hidden under the base wrap and a pattern thread to the left will show up
on top of the base wrap. The movement of these threads left and right with the
continuous base wrap up the blank creates the weave.
No how do you turn a
logo, Name, or image to a weave? There is software around that will convert
images into Left lists and label everything nicely. You can also buy patterns
from several vendors that do all the dirty work for you. But what if you have a
custom logo say the Maryland Kayak Fishing logo? How do we convert this logo
into a nice weave on a fishing rod? There is no easy way minus the options I
mentioned above. You will have to somehow transpose the image onto a graph and
then mark the cells where a pattern thread is present. Every cell containing a
pattern thread will become a Left thread. Any space void of a pattern thread
will become a Right Thread. So what does the final left list look
like?
Here is the full pattern left list I created for the sites logo.
Thanks Grilled Sardine for permission to use this artwork.
Lets
zoom in and see whats going on in this pattern.
As
you see the pattern is broken up into Segments. 1 thru 10 on the horizontal
(Base Wrap) and 1 thru 10 on the vertical (Pattern Threads). This numbering
continues in the next segment for the 20's, 30's up to the pattern end. This
numbering is the thread count of the pattern mentioned earlier. Every Vertical
column relates to a full base wrap around the rod. Every horizontal row relates
to a single pattern thread. In this example our pattern will be 133 x 60 (133
base wraps and it will contain 60 pattern threads).
Looking closer we can
see the pattern threads left and right rules spanning across the weave. These
markers will tell us when to move a pattern thread to the left or right.
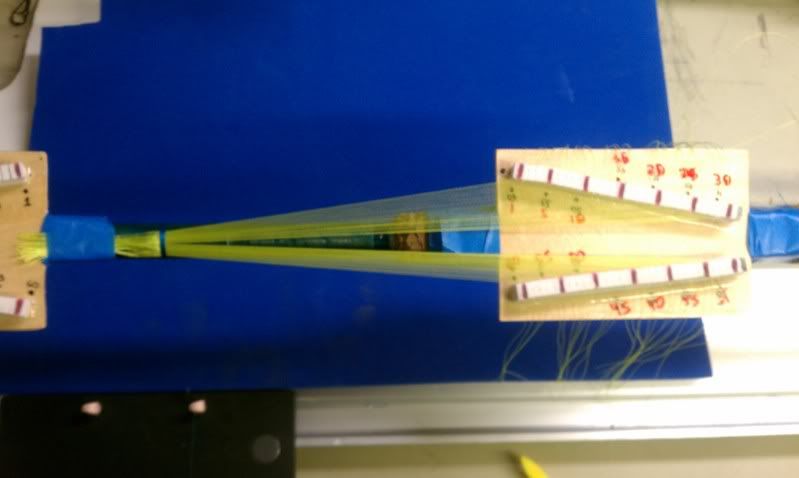
Now
how do we get this on the rod? We need a way to hold 60 horizontal threads
parallel to the blank and at the same time keep track of all these threads
individually. The answer to this is a weaving loom (Jig). You can buy pre-made
looms from vendors ranging form 40 pattern threads to looms that allow you to
weave around the whole circumference of the blank.
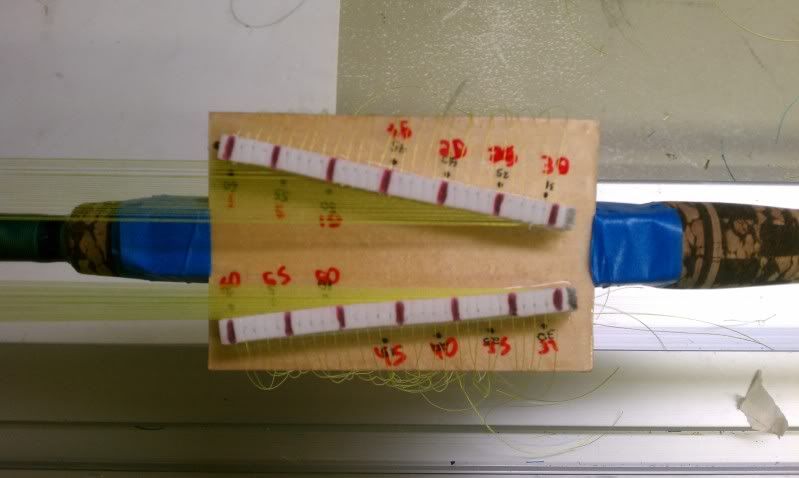
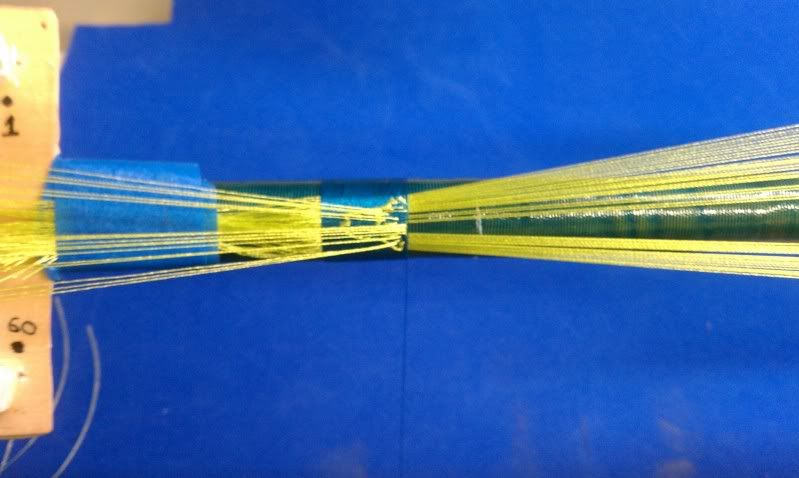
For the basic
weaves I have made a simple loom using scrap wood and some foam strips glued in
place. Slits were cut into the foam strips to hold the threads and I marked the
thread counts relating to location. As you see not only did I mis count when I
originally labeled everything a also reversed on side. This explains the messy
and mislabeled loom.

The
loom will need to be secured to the blank with tape on either side of the weaves
intended location. The pattern thread will be cut to size and inserted into both
sides of the loom running parallel to the blank.
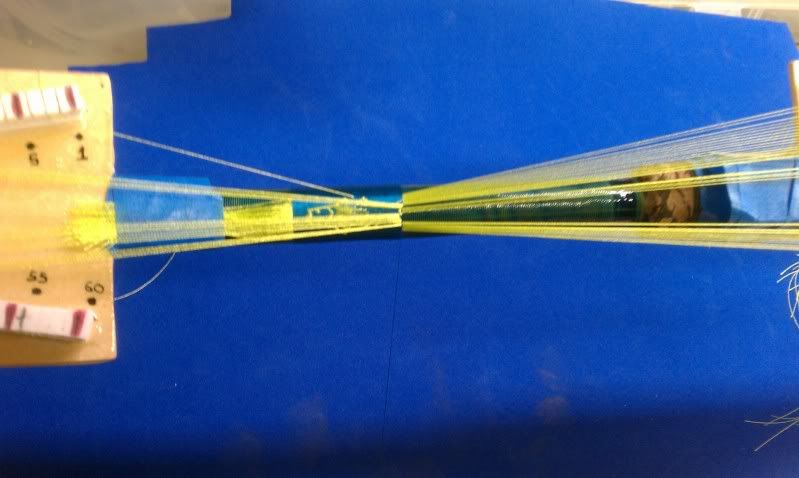
Leave
3 or 4 inches of extra thread hanging off the right side of the loom. You will
need this extra thread when snugging down the base wrap.
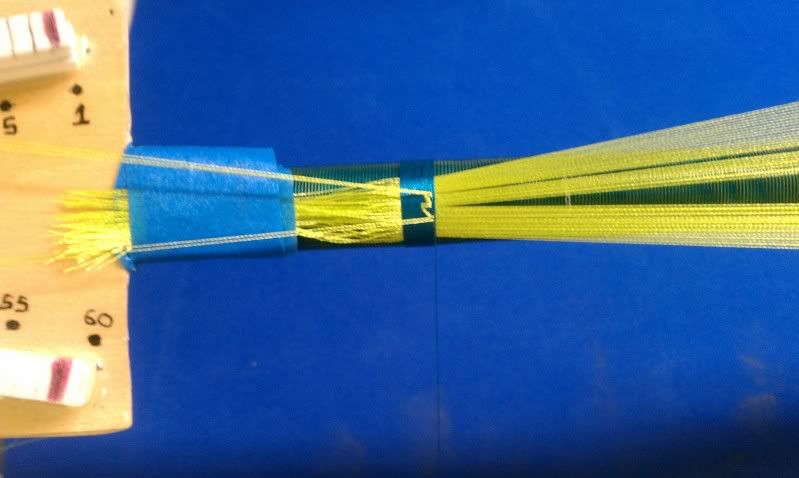
Once you have all the pattern threads setup you will need to start the base wrap
on top of the pattern threads. Make several passes and lock the base wrap
down.

When
you have the base wrap secured bunch the pattern threads together. You want them
to be as close together at the intersection of the base wrap as possible. Make
sure you do not have any threads crossed or overlapping.

You
will now need to trim the left side threads and remove the ends from the left
loom. Keep the left side tags coming from under the base wrap several inches
long to aid in snugging up the pattern later. Tape the cut threads to the blank
to keep them secure and out of the way.

The
loom is not setup for the weave.
Now its just a process of following the left list for the pattern. Use a ruler
to mark completed columns as you go. The most important part of the process is
keeping track of where you are in the pattern.
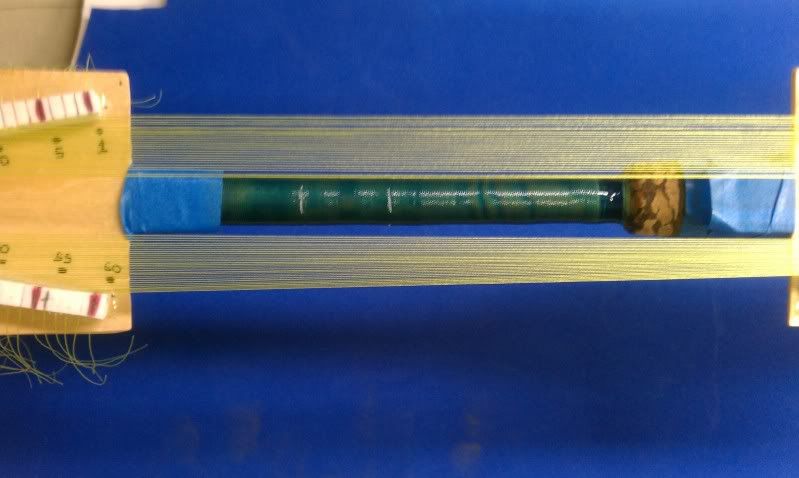
Here
is the final product. We left the tags on to allow us to snug up the
pattern.
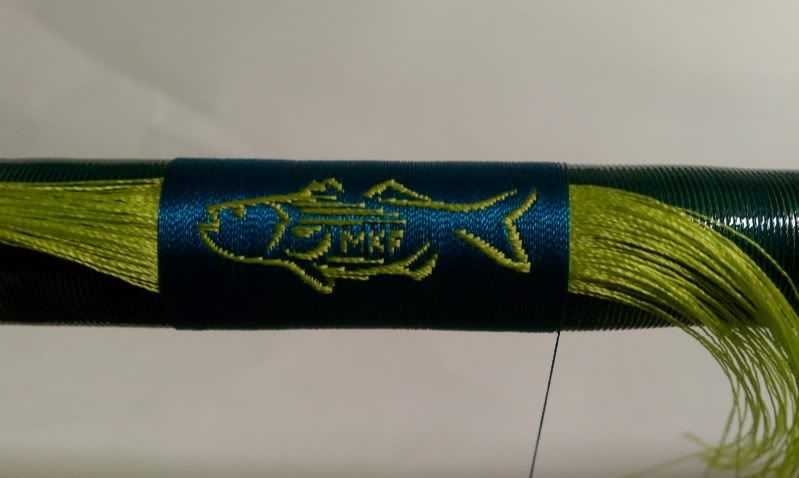
And
with some trim rings and everything tidy waiting for a coat of epoxy.
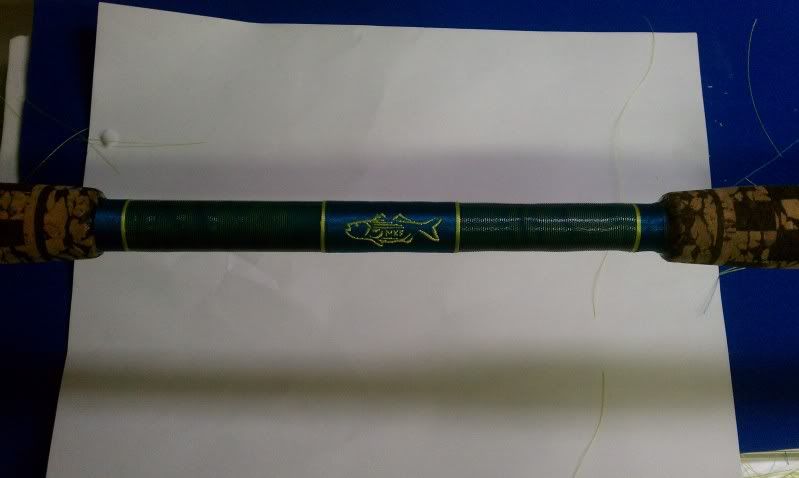
This
rod will have some good Mojo with that logo. I cant wait to jig up something.
Hope you enjoyed ~ MB


